• Home
  • About Us
    • Tech Savvy Mum
    • OUR YOUTUBE CHANNEL
  • Work with us
  • Contact
Menu

Our Family Life with Tech Savvy Mum

  • Home
  • About Us
  • TECH SAVVY MUM
    • Tech Savvy Mum
  • VIDEOS
    • OUR YOUTUBE CHANNEL
  • Work with us
  • Contact
DraculaJacobHalloween.JPG

Spooky fun at our Halloween party and how to make a zombie bite in 10 easy steps with this tutorial

November 8, 2017

I can't believe how big Halloween is now in the UK. 

I remember the days when I was a kid, we would go trick or treating in the close that I lived in wearing a bin liner and a cheap plastic mask!

I never did throw eggs at any windows as when we knocked on the door, no one said trick! But I wouldn't have dared anyway!

Those days are well and truly gone. 

Now, thanks in part to America, Halloween in the UK is a huge event. Aisles full of Halloween goodies, costumes and so many sweets can be found in every supermarket.

Everywhere you look, people have gone bigger each year with fancy dress and decorating their houses.

My daughter who loves a bit of gore and zombies, wanted to be made up to look like she had been bitten by a zombie (que the Walking Dead music).

So I took up the challenge and headed to YouTube to see if there was an easy tutorial I could find and use things I had lying around the house instead of having to buy lots of expensive special effects make-up.

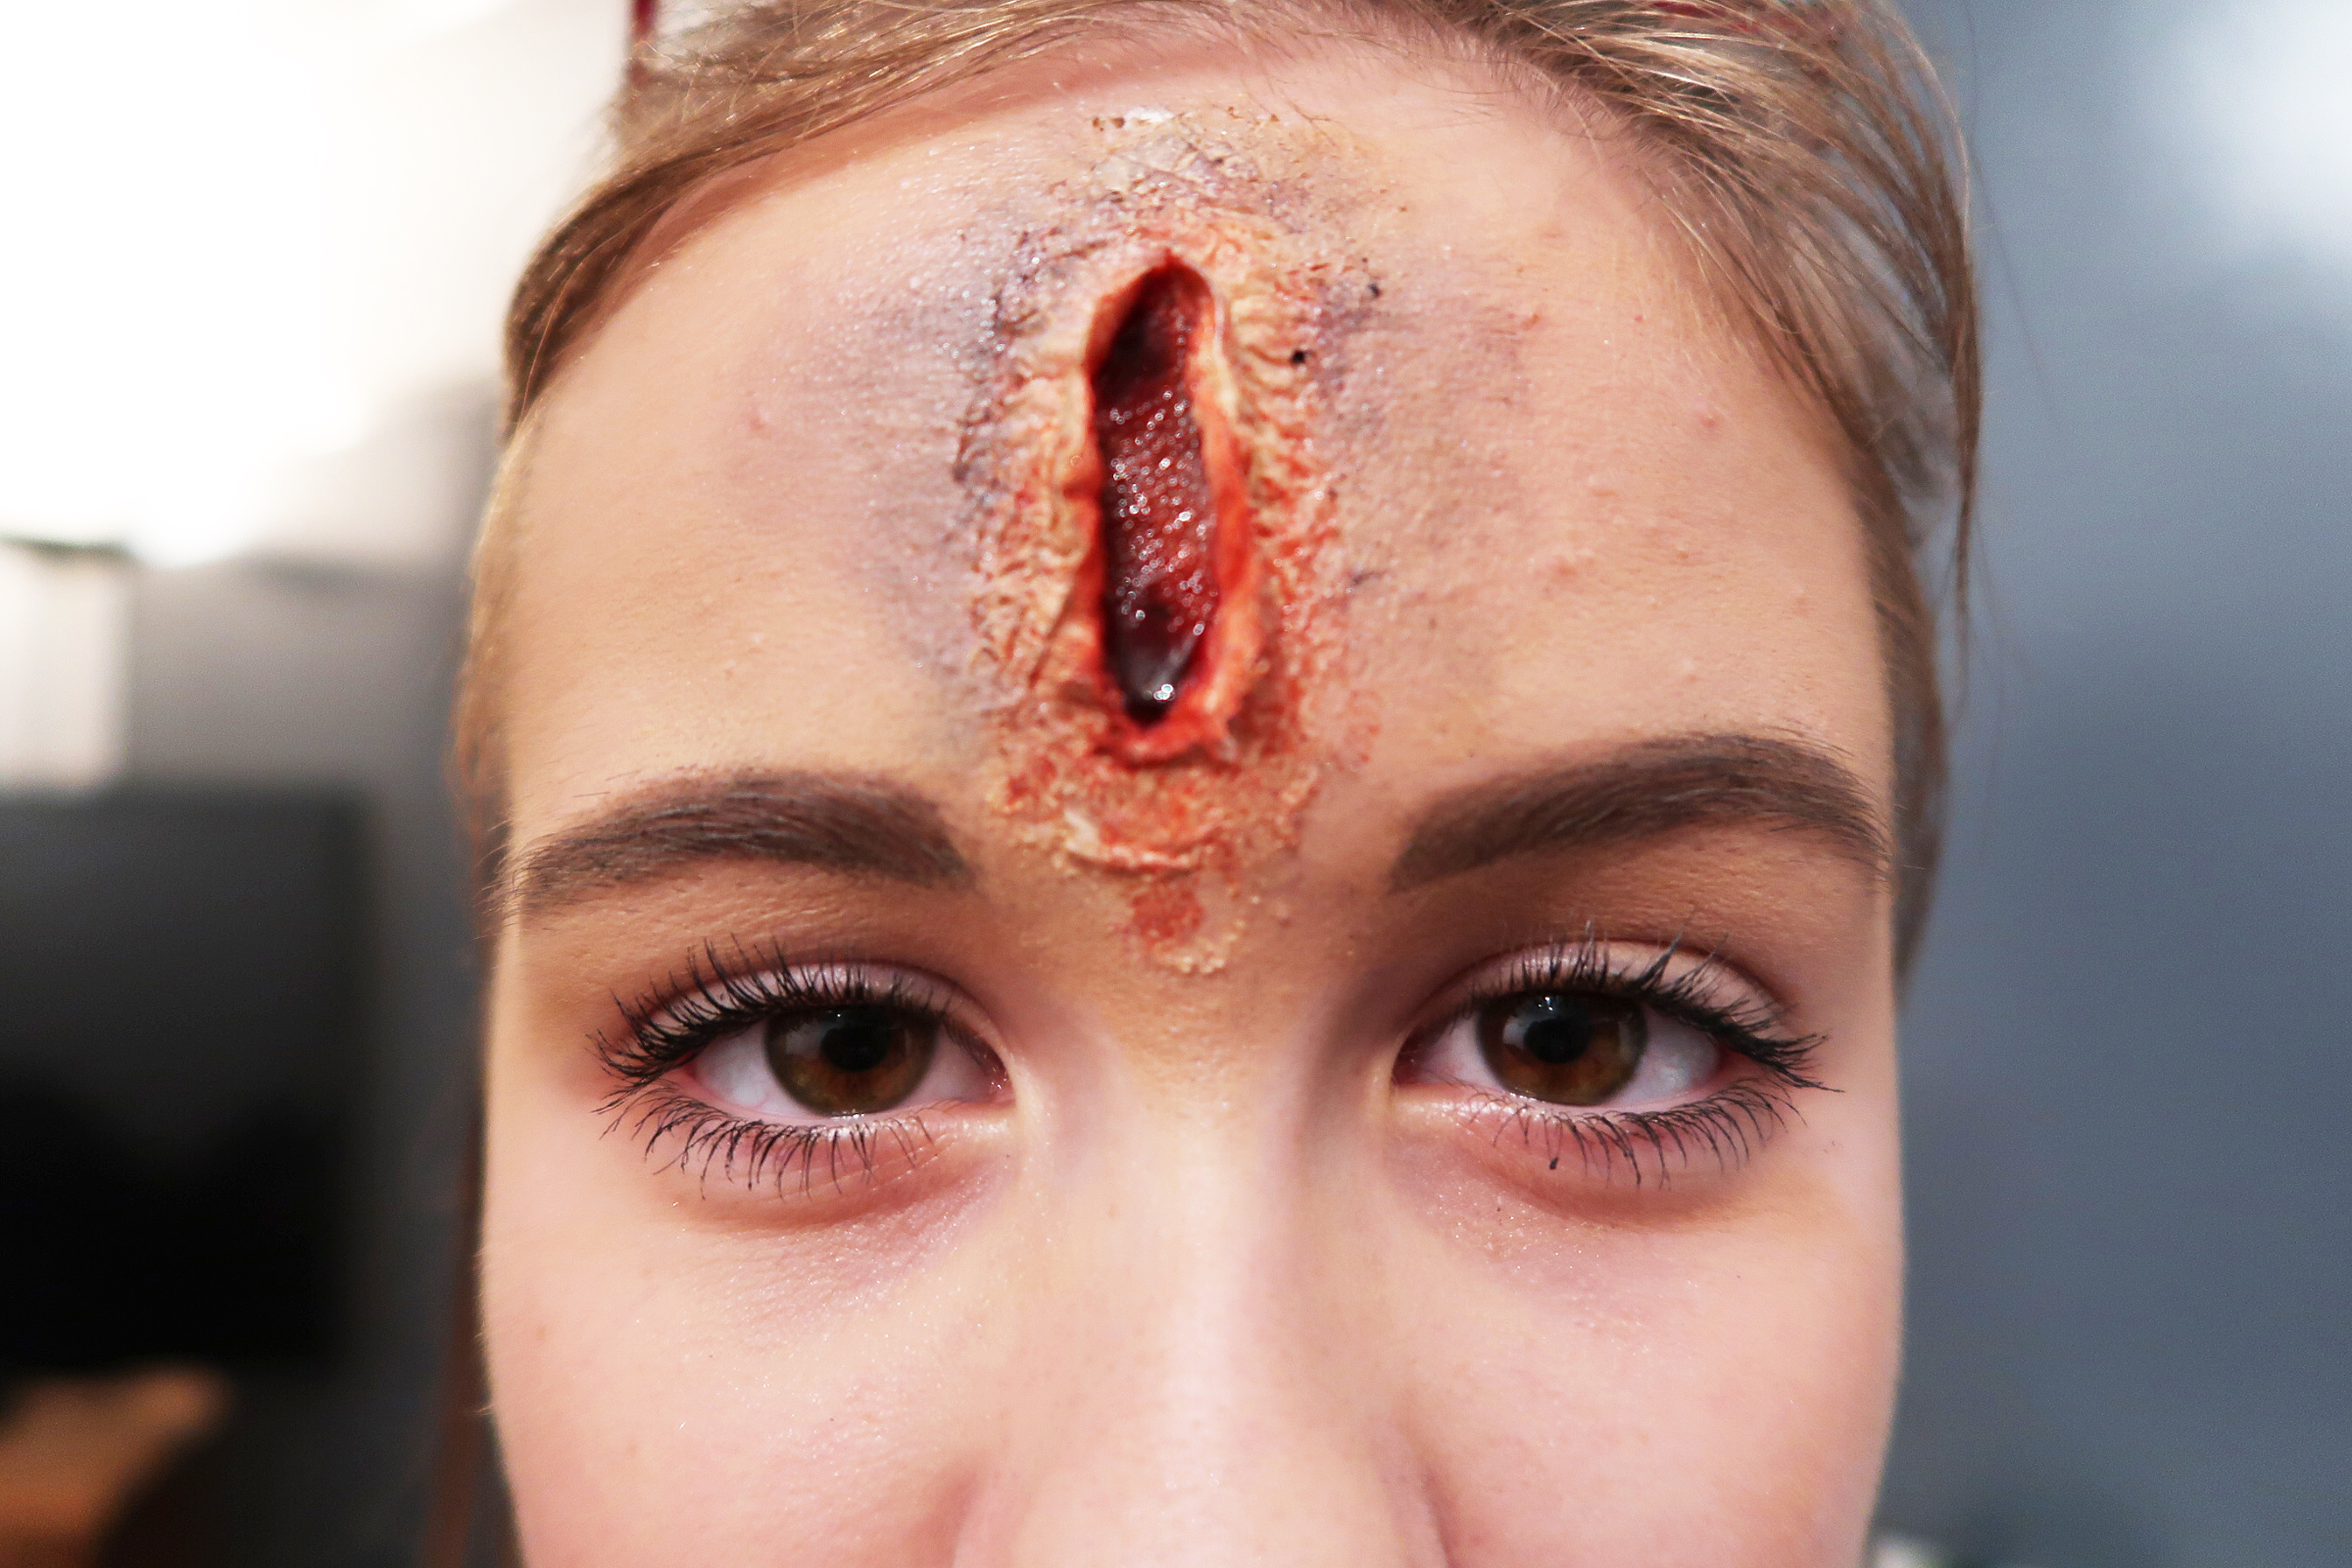
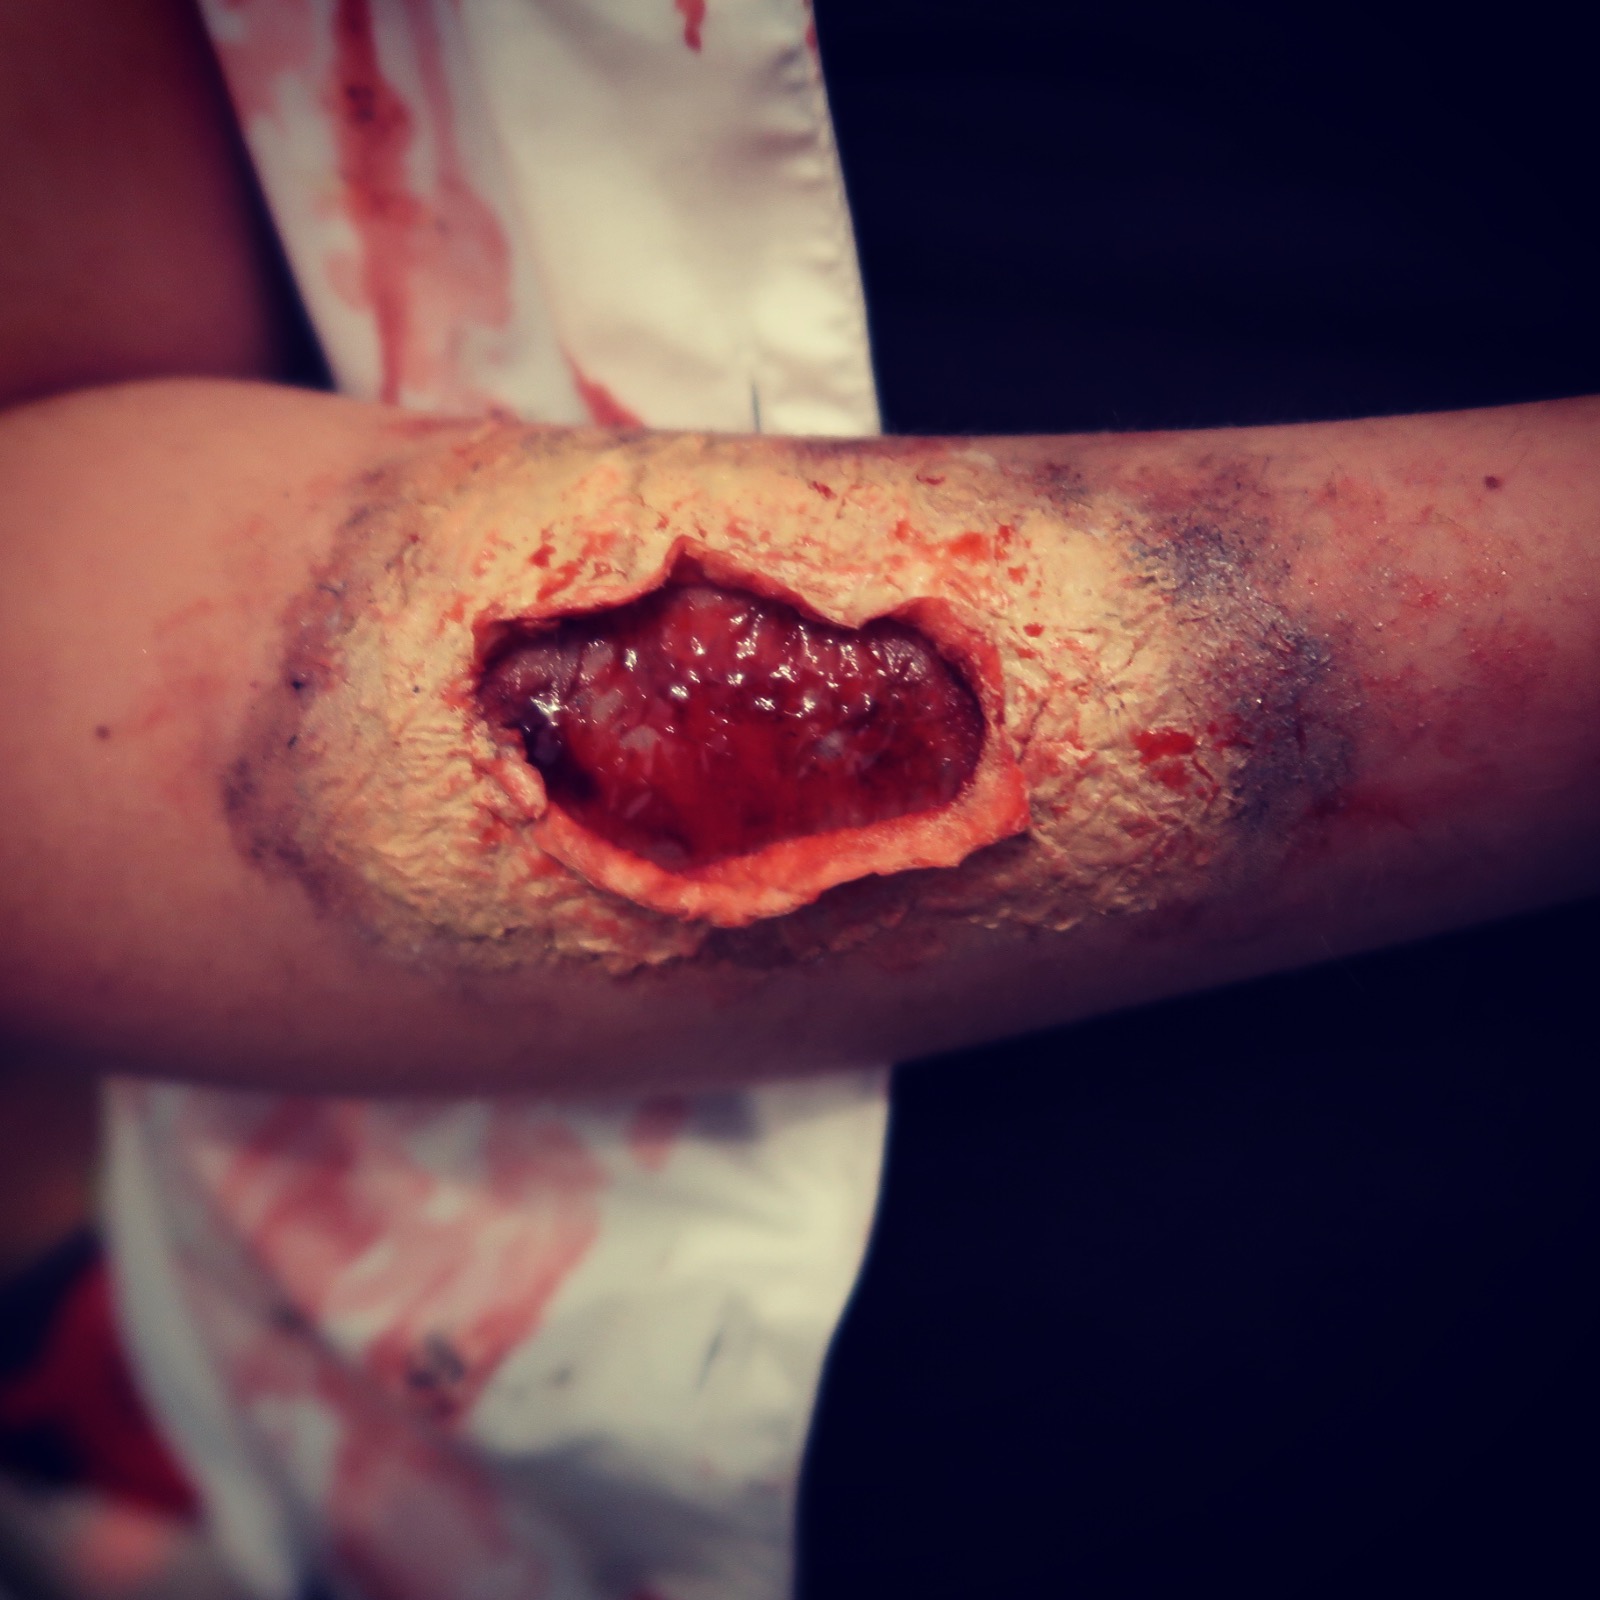
Luckily for me, I found one, and I managed to create an open wound on Amber's head and arm.

10 step zombie bite make up tutorialthis.png

How to make a wound, what you need:

PVA glue
Toilet paper/cotton wool
Foundation (to match your skin tone)
Black eyeshadow
Fake blood (we used lighter red and a congealed looking gloopy dark red fake blood)
An old small paintbrush (to apply the PVA and blood)
Make-up sponge to dab the foundation on

I can't tell you how easy this is to do, and the effect is brilliant. See for yourself in the pictures of Amber.

Halloweenmakeupspecialeffects.JPG

Here's what I did:

Step one: Using the paintbrush apply a thin layer of PVA glue onto the skin.

Step two: Rip off small bits of toilet paper and stick to the glue.

Step three: Continue with the PVA glue and toilet paper layers.

Step four: Once you have got about 6 layers on, leave to dry. Or cheat and use a hairdryer on a cool setting for quickness.

Step five: Very carefully using small scissors, gently cut a small hole at one end of where the wound will be, just in from the edge.

Step six: Cut the glue and toilet paper to the desired length of the wound you would like.

Step seven: Gently open the glue to create an opening.

Step seven: Trim the excess off, but leave some of the edge sticking up.

Step eight: Use foundation and sponge to gently pat make up all over the outside, on the top of the glue and toilet paper. Cover well.

Step nine: Dab black eyeshadow in the opening.

Step ten: Dip some of the congealed blood and spread it out inside the wound, then add some of the lighter (fresh looking) blood around the outside.

Halloweenspecialeffectsmakeupwound.JPG

Looks real doesn't it! Ewwww.

I'm really pleased with how it turned out to say I have never done it before. I love a YouTube tutorial.

Amber went out trick or treating with her friends, and we decided to do a little Halloween party at home for our son Jacob.

Jacob didn't know I would dress up, so he was a little scared when I opened the door when he came home from school. He wanted to wear his Dracula outfit, complete with fangs and dripping  blood!

We had great fun making Halloween biscuits, we had a couple of fails with the icing though which you will see in the video below.

Daddy carved the pumpkins after the kids designed the faces they would like. Does anyone ever make anything with the inside of pumpkins? We always end up throwing it all away!

Hallowenbiscuitsandpumpkins.JPG
HalloweenJenningsfamily.JPG

When Amber got back from trick or treating, she had a bag full of sugary goodies.

Where we live, we never get anyone coming to our door on Halloween, as we live on a road without a pavement and the houses are quite spread out. But we always get sweets just in case, and what a shame, no one came again this year - oh well, we will have to eat them!

When Amber got back, my husband Mark asked if anyone said 'trick'. She just looked at us blankly. She had no idea that if people said 'trick' rather than 'treat', you would have to play some kind of trick on that house.

Let's face it, that never happens nowadays.

MummyandJacobHalloween.JPG

I think our little party was a great success, and now all the decorations have gone back in the loft to wait for an even bigger Halloween next year.

I made a video of our Halloween party, see below. We'd love you to subscribe to Our Family Life channel on YouTube.

Subscribe to our family life on youtube
In Video, How to make it Tags Halloween, tutorial, how to make a zombie bite, 10 step guide to zombie make up, Dracula, Witch, video, zombie make up, Halloween costume
Comment

How to make a pom pom in under 5 minutes

March 5, 2017

I love pom poms! At work in The Sunday Mirror we printed a picture of Paloma Faith wearing a fantastic jumper covered in pom poms. 

People at work know I like to craft, so I said I would do a step-by-step tutorial for the paper. I also made a video.

Who doesn't love a soft, squishy pom pom? They're all the rage at the moment with many pages on Instagram dedicated to the brightly-coloured balls of fluff. A great accessory to bring a pop of colour to any outfit.

Gone are the days when you have to spend hours making one pom pom. I remember cutting out 2 circles of card from a cereal box and spending ages threading the wool through the circle and over, through the circle and over, again and again. Yawn!

I love gadgets, especially ones that are time-savers. As a full-time working mum of two children, anything that saves time gets my vote. Whoever came up with this little time-saving gadget deserves a crafty medal, or maybe a pom pom garland.

The Clover Pom Pom maker, a favourite of craft queen Kirstie Allsopp and should be in every crafters sewing box. You will find 4 different sizes in my favourite craft shop - Hobbycraft.

They can look a bit tricky to use, so I have done a step-by-step guide on how to use them. I've even recorded a video so you can watch and pause every step of the way. I learn so much of my crafts from watching videos on YouTube.

What you need:

Wool
Clover pom pom maker
Scissors

Step one:

Wrap the wool around one of the arcs (one arc is formed of two arms). Continue to wrap the wool around until the arc is completely covered. Repeat for the remaining arc. Close both the arcs.

Step two:

Insert your scissors into the slit on the side of the machine, and cut all of the way around both arcs.

Step three:

Insert a piece of wool into the middle of the machine and pull tight, secure in place with a knot.

Step four:

Gently remove the pom pom by releasing both arcs of the machine. Remove the central sections by gently pulling on both sides. Trim off the little sticky out bits.

I have made a step-by-step video. Enjoy!

Subscribe to Our Family Life
In Video, How to make it Tags How to, How to make, tutorial, Video, video tutorial, pom poms, pom pom maker, clover pom pom maker, craft, wool
Comment
main.png

How to makeover a Welsh dresser using Annie Sloan paint in Paris Grey

July 27, 2015

I recently bought a gorgeous Welsh dresser from eBay. When I bought this pre-loved item, I thought I would paint it. A bit daunting I hear you say. Well let me tell you, it was easy-peasy!

Read More
In Tried & Tested, How to make it Tags Annie Sloan, Annie Sloan Paint, Paris Grey, tutorial, DIY, How to, Paint a dresser, Welsh dresser
5 Comments
AdeleNew pic2021.JPG

Hello! I’m Adele

I’m a mum of two, Art Director
of The Sunday Mirror & The Sunday People newspapers and a Tech Savvy Mum. Trying to navigate my way around the world of online to help my kids and other parents keep their children safe and have a great experience in the wonderful world of online.
I love design, lattes and learning new things!

ABOUT US

FEATURED IN

Logossidebar.png

LATEST POSTS

Featured
12 tips to help keep children safe online and have a great experience
Free online educational websites for parents and carers homeschooling during lockdown
Featured
World Book Day: How to make a Fantastic Mr Fox costume for kids
Planet Jacob
Planet Jacob - Watch Jacob's magic show

Follow us on Instagram

Non uniform day at school today for Comic Relief. My son is loving his new @ironmaiden battle vest 🥰🤘🏻
Had such a great night with my daughter @ambereej  @leascliffhall. Disco for Grown Ups was brilliant! I was aiming for a Farrah Fawcett hair do but ended up a decade later in Dynasty! What a fabulous night. Take me back to the 80s and 90s! Good times
Happy New Year! 🥳

Categories

  • Travel (4)
  • Books (5)
  • Days out with the kids (5)
  • Tried & Tested (7)
  • Video (7)
  • How to make it (8)

ourfamilylife.co.uk, techsavvymum.com, techsavvymum.co.uk, techsavvymums.co.uk, techsavvymums.com and all content is the property and copyright of Adele Jennings 2025.